This article will detail the steps required to enable and disabled the Out of Office Assistance feature within Outlook.
For Microsoft Office Outlook 2019 and 2016.
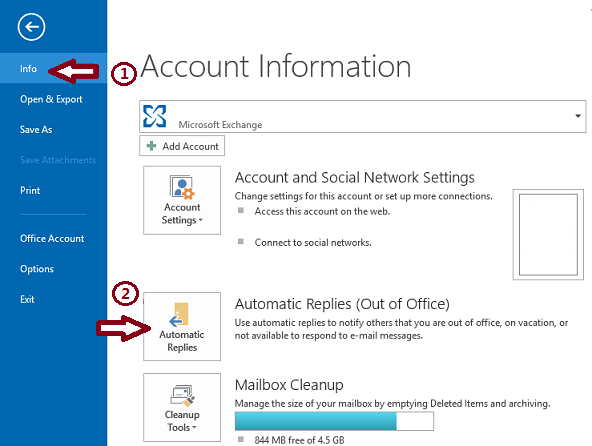
- Click the File tab, and then click the Info tab in the menu.

- Click Automatic Replies (Out of Office).
- In the Automatic Replies dialog box, select the Send Automatic Replies check box.
- If you want to specify a set time and date range, select the Only send during this time range check box. Then set the Start time, and then set the End time.
- In the Inside my organization tab, type the message that you want to send within your organization, and in the Outside my organization tab, type the message that you want to send outside your organization.
- Click OK.
- If you selected the “Only send during this time range” option in step 4, the Automatic Replies (Out of Office) feature will continue to run until the date and time set for the End Time in step 5 is reached.
Otherwise, the Automatic Replies (Out of Office) will continue to run until you repeat step 1 and select the “Do not send automatic replies” option.
Was this article helpful?
That’s Great!
Thank you for your feedback
Sorry! We couldn't be helpful
Thank you for your feedback
Feedback sent
We appreciate your effort and will try to fix the article